
They were part of a very clever halloween party display. The other pin was every popular "sharpie on a coffee cup". We've seen it a million times, but the original photo came from the Brookish Etsy shop.

Their shop is lovely and you should definitely check it out. Anyway...those two ideas have been stashed in my "to do someday" file and when I saw orange mugs at the dollar store last week they sprang to the "to do NOW" file.

What you need:
Your favorite brownie mix prepared in a 9x9 pan so they are thicker
White chocolate covered pretzels
Wilton 4" lollipop sticks
Marshmallows
Wilton edible ink pen in black
Wilton treat bags
2 1/2" round cookie cutter
Orange mugs
Sharpie OIL BASED pen in black
Acrylic Sealant spray
UPDATE: I tried a second set of mugs with a Deco Art Glass paint marker. I was MUCH happier with the results; no flaking, and I didn't have to use the acrylic sealant.
Make your brownies and use the round cutter to cut your shapes. Why round? It fits into the mug better. Yes, this creates a lot of waste...if you call having all the crunchy edges left to eat for yourself waste.


Insert the lollipop stick into your brownie towards the back.
Stack your pretzels on the stick; if you are using the 4" lolli stick it will take 7 pretzels.
With the edible pen draw an appropriately skeletal face on a marshmallow.


Please note: Make sure you use a light touch, or let your marshmallows get a little stale. I found that the pen wanted to rip up the marshmallow.
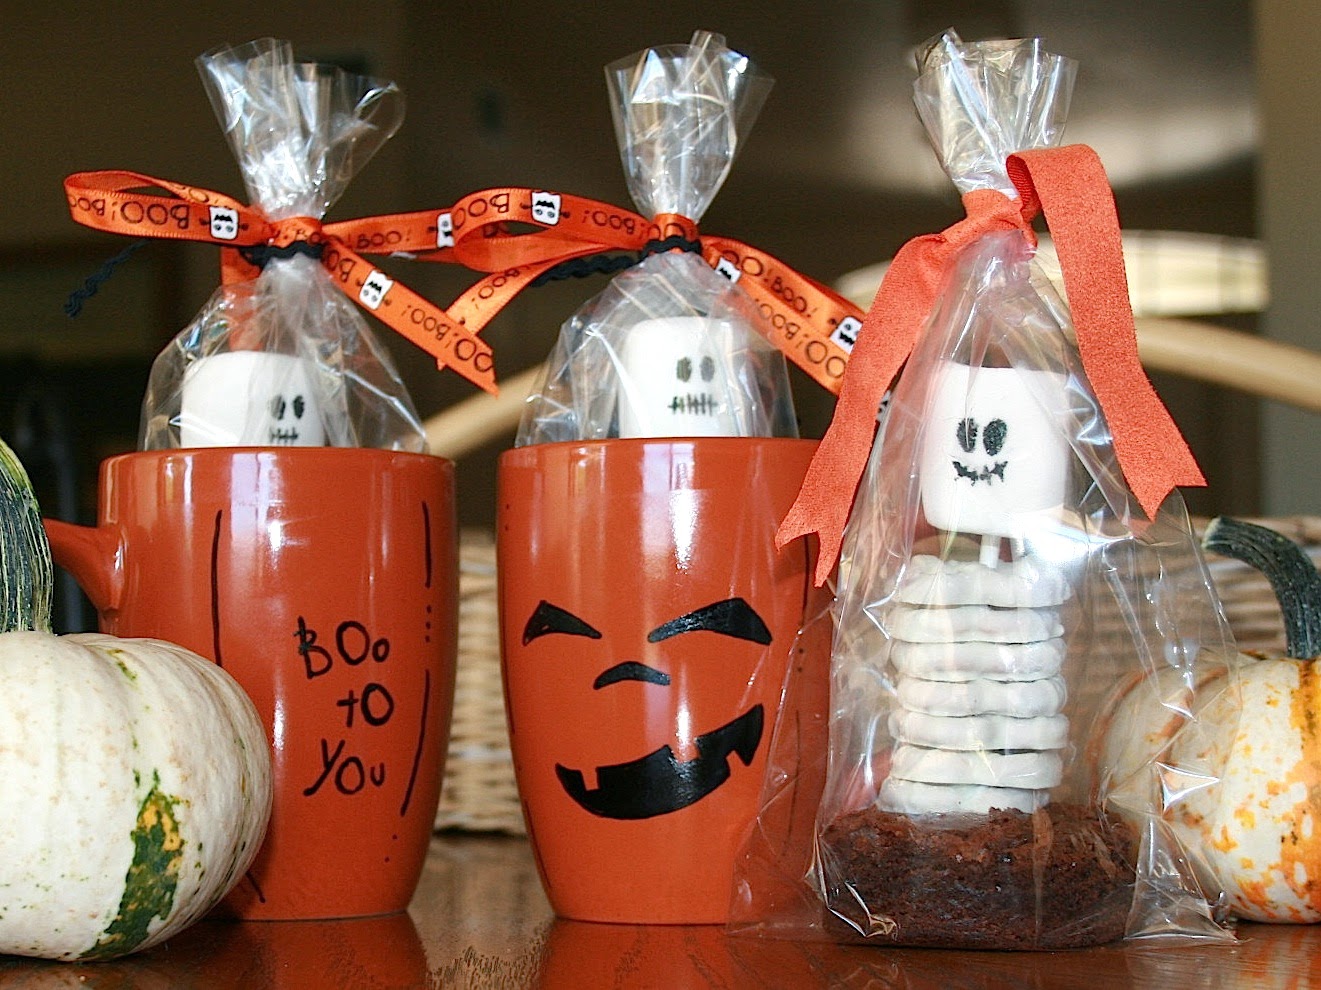
Insert the marshmallow onto the stick making sure you don't poke it through the top. Now how cute is this?

 Place your creation into a treat bag. Want to know a trick so you don't mess up your treat bags? Next time you pick up a large drink from your favorite convenience store get the plastic cup and save it; cut off the bottom and voila! You have created a wide mouth funnel for yourself. Insert it in the treat bag and then slip your Boney Brownie in without getting any smear marks on the bag. This also works great for adding sauces into vacuum freezer bags.
Now onto the mugs. For every post I've seen about using a sharpie on a coffee mug I have seen a post that says it doesn't work. The Cabin Connection blog took the time to experiment with the different methods to see which worked best. Turns out it is using an oil based Sharpie pen, baking it and then coating it with acrylic sealant spray. I was a little nervous about the sealant, so I taped off the top of the mug where your mouth would be so that would remain sealant free.


Take a moment to draw your design on a piece of paper to use as a reference. While you can easily remove any mistakes with acetone before you bake, it's still a messy job.
I found it easiest to draw the outline and then fill in. Please note: be VERY careful with your mug until you have sprayed on the sealant and allowed it to dry. The paint flaked off very easily - even after baking.
Your mugs are done and ready to hand out as treats! If I had more time I would have added a card with:
No "bones" about it, knowing you is a treat (let the bad halloween puns begin!)!
No comments:
Post a Comment