Saturday, October 19, 2013

Week 36 Craft: Posed Dollar Store Skeleton

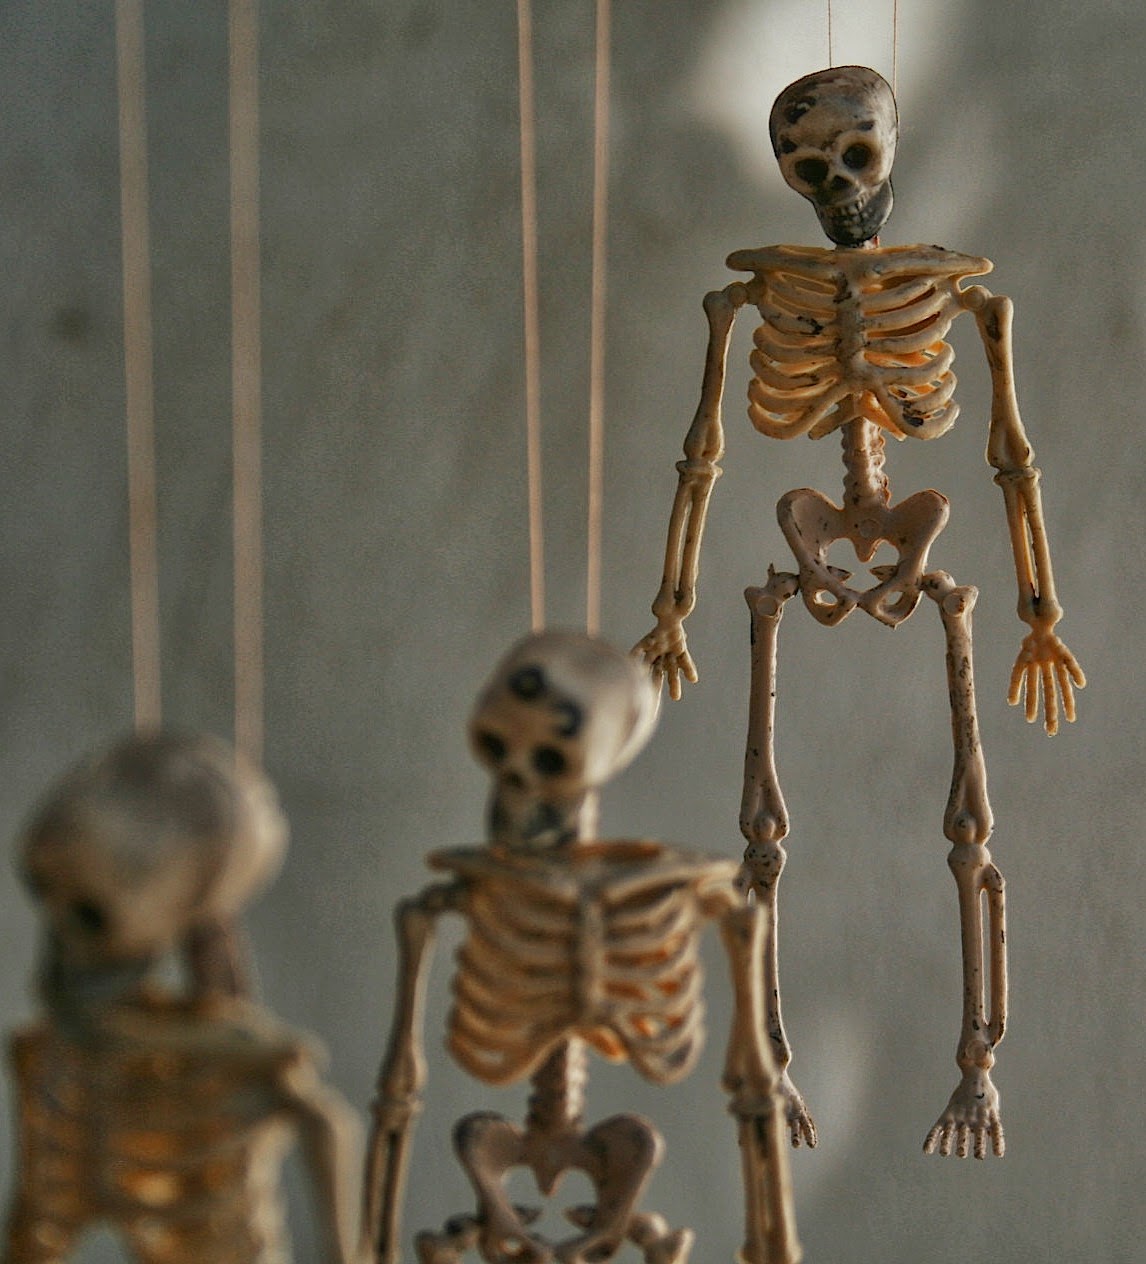
Here is a quick, easy and completely silly craft to tuck into that corner that just needs a "little something halloween".  This is my second craft inspired by Mizerella blogspot.


First go around I was inspired by the silver paint for my Skeleton Door Hanger.


This time around I tried the posing for my primping girl skeleton:


What you need:
Skeleton from Dollar Tree skeleton garland
Pot of boiling water
Scraps of tulle and ribbon
Needle and thread
Ultra fine black sharpie

Instructions:
1. Check out Mizerella's post for how to get your skeletons into the pose you want.  The basics are to heat the skeleton in the boiling water to make it more plyable, remove it from the water and very slowly bend the arms and legs into the position you want.  Once in position hold it there until it cools.  Be gentle!  These skeletons will move somewhat, but just like me, the joints are stiff and brittle.
2. I used two layers of black tulle and one of shiny orange to make her skirt.  I used pieces that were about 15" long and 2" high.  With your needle and thread run a gathering stitch through the top of the tulle and gather tightly.

3. Take your piece of ribbon and sew it into place over the gather.  Leave tails on either end to tie a bow around the waif like waist of your skeleton.

4. I wanted to give her just a little glam so I used the sharpie to add some eyelashes and fill in her sockets.

5. Her head still looked a little too plain, so I added a tiny headband.  


She found a home nestled next to the soap in my guest bath, so she can primp in the mirror for all of eternity....and wonder if that skirt makes her look fat.


Week 35 Craft: Dollar Store Skeleton Door Hanger

The witching hour is near, you hear a slight rustle behind you, but when you turn nothing is there.  Was it your imagination, or something much more sinister?  This week's project is intended to send a fun little chill up your spine: a Skeleton Door Hanger.


The original inspiration came from the Mizerella blogspot.


The post on how to make costume awards out of dollar store skeletons cracked me up.  So I jumped in the car and headed for my nearest Dollar Tree.  Not only did I find the skeleton garland, it's also where I found those great orange mugs for my "painted mug" tutorial.

What you need:
Plastic skeletons garland (found at Dollar Tree)
Chrome spray paint
Chenille twist wire
Thread
Thin black ribbon (or twine)
Fun Fur in black
Scrap of ribbon
Jingle bell (found at Joann's)

Instructions:

1. Start by cutting the twine off of your skeleton garland.  The garland comes with four, but I only used three.
2. Take some sewing thread, double it up and make a knot...just like you would if you were going to sew, but leave out the needle.  This will make a handy loop that you can gently set your skeleton in.  What you are looking for is a way to suspend the skeleton for painting that won't get in the way.

I looped the threads through a stick and suspended the stick between two sawhorses, I'm sure two chairs would do nicely if you don't happen to have sawhorses lying around.

3.  Using the chrome spray paint go ahead and paint the skeletons.  Go nice and slow, the spray will get those guys spinning pretty quickly.

Let them hang out while they dry.

4. Once dry it's time to "string 'em up".  I used 1/8" wide ribbon and tied a noose around their necks.  The flat ribbon made it a little tricky to work with, but I wanted to stay with all black.  Oh, and I didn't know how to tie a noose, so I googled it.  Yeah..... that will make you feel a little uncomfortable.  It's not like you normally need to know how to tie a noose just for fun.   Here's  an easy to follow video.  

5.  Next up is making the loop for your door hanger.  I took the ribbon nooses, made them in various lengths and tied them to a piece of chenille twist tie.  Cross the ends of the tie over each other and twist around to secure the loop.


6.  Using the Fun Fur crochet around the chenille loop; it's not 100% necessary to do, but makes the loop look much more substantial as well as more "finished".  Don't know how to crochet around a loop?  Here's a great tutorial from the Kraft Farm.


7.  Now it's time to guild the lily.  I wanted to stick with the black theme as much as possible, so I tacked on a piece of striped ribbon and a black jingle bell I had laying around from one of last year's projects.  Go as simple, or crazy, as you like.

All that remains is for you to hang this on your favorite victim's door.  The skeletons will sway as the door opens, creating an ever so slight noise....is that the undead coming for you?  The tiny tinkle of the bell - a harmless, random noise, or the sound of a ghostly cat roaming from room to room?


Tuesday, October 1, 2013

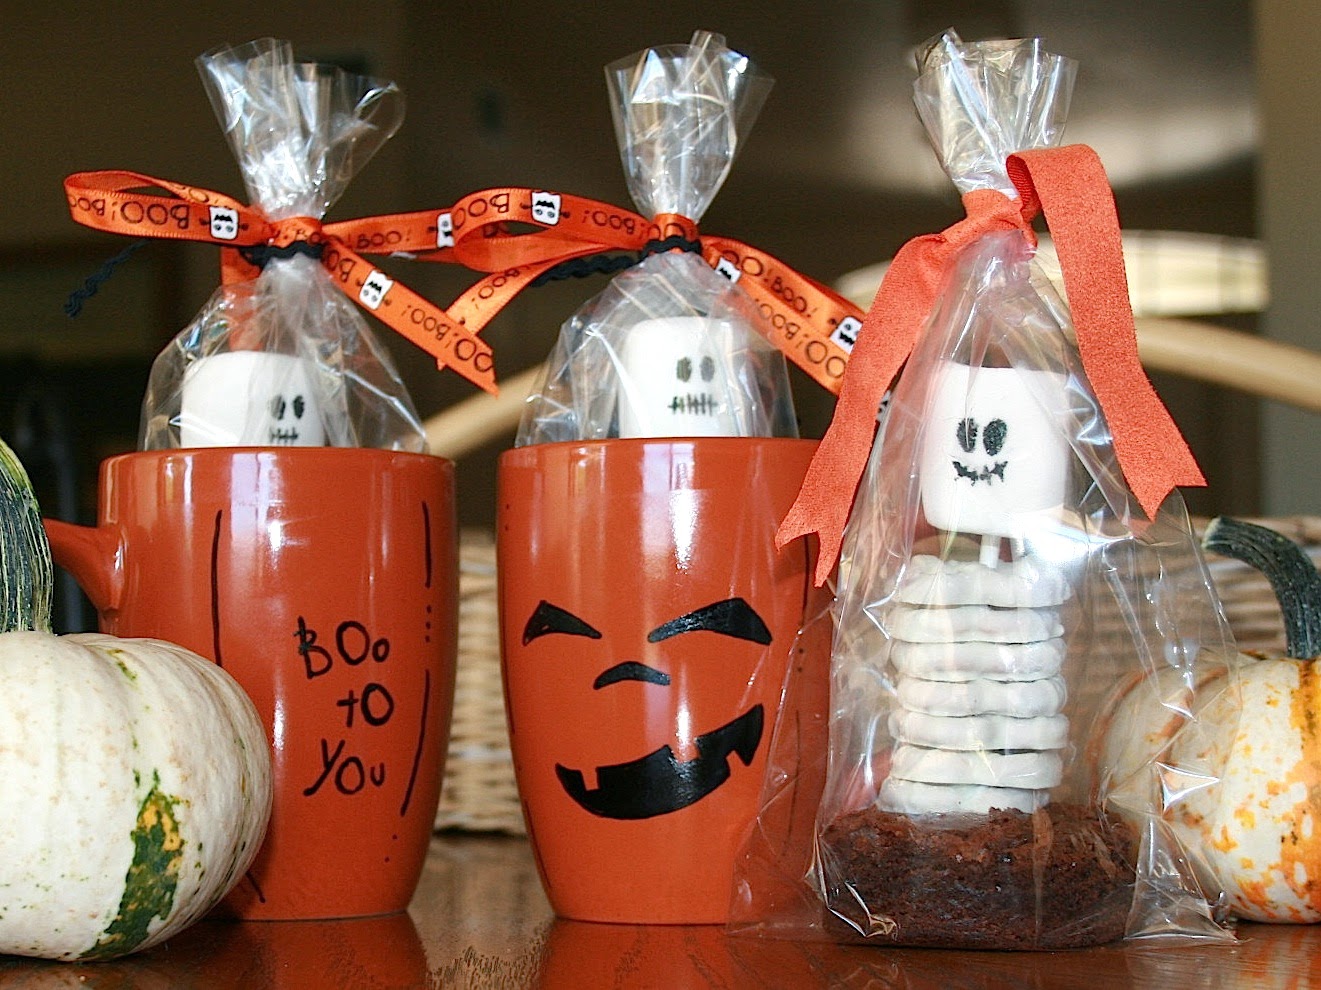
Week 34 Craft: Pumpkin Cup with Boney Brownie

This week's inspiration comes from two of my very first pins. I just fell in love with these little skeleton brownies fromWants and Wishes.


They were part of a very clever halloween party display.  The other pin was every popular "sharpie on a coffee cup".  We've seen it a million times, but the original photo came from the Brookish Etsy shop.  

Their shop is lovely and you should definitely check it out.  Anyway...those two ideas have been stashed in my "to do someday" file and when I saw orange mugs at the dollar store last week they sprang to the "to do NOW" file.


What you need:
Your favorite brownie mix prepared in a 9x9 pan so they are thicker
White chocolate covered pretzels
Wilton 4" lollipop sticks
Marshmallows
Wilton edible ink pen in black
Wilton treat bags
2 1/2" round cookie cutter

Orange mugs
Sharpie OIL BASED pen in black
Acrylic Sealant spray
UPDATE: I tried a second set of mugs with a Deco Art Glass paint marker.  I was MUCH happier with the results; no flaking, and I didn't have to use the acrylic sealant.

Make your brownies and use the round cutter to cut your shapes.  Why round?  It fits into the mug better.  Yes, this creates a lot of waste...if you call having all the crunchy edges left to eat for yourself waste.
  

Insert the lollipop stick into your brownie towards the back.  
Stack your pretzels on the stick; if you are using the 4" lolli stick it will take 7 pretzels.

With the edible pen draw an appropriately skeletal face on a marshmallow.


Please note: Make sure you use a light touch, or let your marshmallows get a little stale.  I found that the pen wanted to rip up the marshmallow.  

Insert the marshmallow onto the stick making sure you don't poke it through the top.  Now how cute is this?  


Place your creation into a treat bag.  Want to know a trick so you don't mess up your treat bags?  Next time you pick up a large drink from your favorite convenience store get the plastic cup and save it; cut off the bottom and voila!  You have created a wide mouth funnel for yourself.  Insert it in the treat bag and then slip your Boney Brownie in without getting any smear marks on the bag.  This also works great for adding sauces into vacuum freezer bags.


Now onto the mugs.  For every post I've seen about using a sharpie on a coffee mug I have seen a post that says it doesn't work.  The Cabin Connection blog took the time to experiment with the different methods to see which worked best.  Turns out it is using an oil based Sharpie pen, baking it and then coating it with acrylic sealant spray.  I was a little nervous about the sealant, so I taped off the top of the mug where your mouth would be so that would remain sealant free.


Take a moment to draw your design on a piece of paper to use as a reference.  While you can easily remove any mistakes with acetone before you bake, it's still a messy job.

I found it easiest to draw the outline and then fill in.  Please note: be VERY careful with your mug until you have sprayed on the sealant and allowed it to dry.  The paint flaked off very easily - even after baking.  


Your mugs are done and ready to hand out as treats!  If I had more time I would have added a card with: 
No "bones" about it, knowing you is a treat (let the bad halloween puns begin!)!


Thursday, September 12, 2013

Week 33 Craft: Peet Pot Frankenstein

One of the things I most love about Pinterest is seeing the amazing crafts people come up with by re-purposing a product into something so far away from what it's designed purpose is.  And right now I am crushing on peet pots.  They are so easy to work with, and at 14 for only $1.97 are a total bargain.  Check out this cutie from the making memories blog.


   Or these scary guys from All You magazine...

Here's my addition to the fun:  a peet pot Frankenstein


He's super easy to make and aside from the peet pots you probably have most of the supplies on hand.

Supplies
3" Peet Pots (I found mine in the garden center of Home Depot)
2 white buttons (I used on 3/8" and one 1/2" one)
2 tiny black buttons
Green craft paint (I used Apple Barrel's "Ivy Green")
Black fine point Sharpie (or black craft paint and fine brush)
2 bolts
3" x 20" scrap of black felt
Glue Gun
Needle and thread

How to:
1. Paint your peet pot and let it dry. I painted the inside black so if the felt "hair" doesn't completely fill in my Frank wouldn't look like he had a bald spot.
2. Take a large needle and push through where you want his bolts to go.  The reason I suggest a large needle is so that you can ensure the bolts end up directly across from each other.

3. Insert your bolts.  Once inserted, I liberally coated the portion of the bolt on the inside of the pot with glue from my glue gun so that they were more stable.

4. Using a needle and thread sew your black button onto your white button.  I didn't use the glue gun here because sewing makes it more stable and also less thick.

5. Decide where you want to place the eyes and poke your threaded needle through the pot.  Sew in place with a couple of stitches.  Again, I chose to sew instead of glue for stability and so the eyes would be closer to the pot. Please Note: This part is MUCH EASIER if you do it BEFORE you glue the hair in.


6. Take your felt and with 2" sticking above the top of the pot use your glue gun to adhere it to the pot. Wind it loosely towards the center, adding glue here and there to keep it in place.  Here's a picture of the coil; I got too excited and had started to cut fringe before I remembered I hadn't snapped a photo.

7.  Cut your felt coil into fringe.  I also ended up tapering the ends so it looks more like hair.

8.  Using a Sharpie or paint add some eyebrows and mouth.  This is where you get to choose your Frankie's personality; I went with nervous.


Keep in mind these peet pots are not meant for long term durability; I wouldn't expect this to be a craft that will live on as an heirloom.  And just like gremlins - don't get them wet!


Wednesday, September 11, 2013

Week 32 Craft: Halloween Wreath

The calendar is officially on September, so the Halloween season has commenced - at least if you consider yourself a crafter. Come to think of it, any self respecting crafter started in with the Halloween crafts about the same time you finished the last Cadberry egg. Deco mesh wreaths are all the rage right now, so I thought I'd try my hand at one. While I LOVE the wreaths that look like they're big enough to take on Godzilla I thought I would start with something a little more manageable.


Here's what you need:
Wire wreath form
Deco mesh
Ribbon in various patterns and widths
Pumpkin picks in two sizes
Chenille twist ties
Appliance paint
Painters tape
Metallic spray paint
Silk flowers

1. Grab your metallic paint and spray your smaller pumpkins and the flowers. Be patient with the flowers; they take more paint than you think to get good coverage.


My original thought was to just give them a light spray, but it caused the petals to have a bluish hue.


2.  Paint the larger pumpkins with a coat of the white appliance paint. The finish ends up looking like ceramic, very nice! Once they dry use the painters tape to make stripes, chevrons or checks and spray with the black appliance paint. If you don't have appliance paint you could use acrylic paint and then a high gloss polyurethane to get the same ceramic look, but c'mon...you know you have some way back on that top shelf behind the goo gone.


 Boo!  Some paint leaked under the tape, but I touched it up later.


3. There are about 500,000 tutorials on how to make a deco mesh wreath, so refer to your favorite one. I used one roll and was able to get around my wreath just shy of twice. Don't worry that it didn't make it all the way around a second time; this is where you will add your painted pumpkins.

4. After that I looped and tied some 2" ribbon around the wreath one time. Pop your silk flowers off their stem and space them around the wreath at points where the mesh and ribbon are twist tied to the wreath form. Once you are happy with how it looks, use your hot glue gun to glue them in place.

5.  Arrange your pumpkins in a grouping, tucking the wire picks to the back of the wreath. Once you are satisfied with the placement twist tie them to the wreath form. I left the picks on and chose to wire them in place because I felt they might be too heavy to glue into place. I had also sprayed a berry pick with the black appliance paint and tucked some of those around just for the heck of it.


6.  Take your other ribbons and cut them into 10" lengths. I cut a "V" into the ends for a little added interest. Wrap a twist tie the middle and then tie it to the wreath form. Just for continuity I added one to the right of each flower.


 Your wreath is done. I like how the deco mesh is very shear and with the flowers looks very funereal.