Monday, January 21, 2013

Week Four Recipe: Chicken Braciole

This week's recipe is one of my hubby's favorites.  It's totally delicious, good for you and not too difficult to make.  Here's my version of chicken braciole:

Ingredients:
4 skinless, boneless chicken breasts
1/2 cup of panko bread crumbs
1/2 cup of parmesan cheese, grated
1/4 cup of flat leaf parsley, chopped
1 clove of garlic, minced
salt and pepper for seasoning
1 jar of spaghetti sauce of your choice


Mix together the bread crumbs, cheese, parsley and garlic in a bowl
Butterfly the chicken breasts and then pound relatively thin.  Season with salt and pepper.  

Sprinkle roughly 1/4 of the mixture on top of each chicken breast.  Don't go all the way to the edge because you don't want the filling oozing out.  Roll each breast up and secure with toothpicks or twine.

Heat a tablespoon or two of olive oil in a pan over medium-high heat.  Turn the chicken every two minutes until all sides are browned.

Lower the heat to medium and pour your sauce over the chicken.  Cover and simmer for 15 minutes.  I usually turn the chicken once during cooking.

Remove the chicken from the pan (don't forget to remove your toothpicks or twine!), slice and serve plated over the sauce.  I had a little extra alfredo sauce, so I drizzled some on top for even more flavor.

This Recipe serves four, but if your breasts are large (chicken breasts, that is!) you might be able to stretch it a little farther.

Week Four Craft: Quilt!

Quilting has always been something I've admired, but have been a little wary of trying myself.  My friend and I took a beginner class at Joann Fabric, and we both really enjoyed it.  Armed with my new found "talent" I searched Pinterest for my next project.


This pillow tutorial from Janome really caught my eye.  The illusion of the circle is awesome, and it is such an easy to follow tutorial.


Soooo....I thought why not enlarge it and make a lap quilt.  After all, it is just a matter of making it bigger and piecing together straight lines...what could go wrong?

Step 1. Decide how much larger you want your quilt to be.  I wanted a lap quilt, so I decided I wanted it three times larger than the pillow.
Step 2. Subtract your seam allowance before doing your multiplying.  This is a CRITICAL step (as you will see later on in my post).
Step 3.  Multiply each measurement by three (or whatever multiple you decide to enlarge this design by).
Step 4.  Add the half inch seam allowance back into your measurements.
Step 5.  Follow the tutorial (Janome's tutorial really is great). 
Step 6.  Because I made a lap quilt instead of a pillow I added a binding.
Step 7.  Step back and admire your beautiful quilt; don't forget to pat yourself on the back for the great job you did.  Aren't you clever for for figuring out how to enlarge a quilt pattern on the second quilt you have ever made in your life?
Step 8.  Wait....what's wrong with your quilt?  Step 1 - check.  Step 2 -che.....wait....
AAAARRRRGGGGGHHHH!!!!!!


I was so busy being pleased with myself for even thinking about removing the seam allowance before I enlarged each piece top to bottom that
 I COMPLETELY FORGOT to do the same thing side to side.  My quilt ended up not being square, and is wider than it is long.  It still kinda has the "circle" effect that I found so appealing in the pillow, but not as dramatic.  

Don't get me wrong, I'm still in love with my quilt....I'm just not IN LOVE with my quilt.  If you're a perfectionist like me, you get it.


Here's a website that walks you through how to enlarge a quilt pattern.  

Tuesday, January 15, 2013

Week Three Recipe: Shepherd's Pie


It has been bbbrrrr chilly cold here lately, so this week’s recipe is all about comfort.  Our high here yesterday was only 42.  FORTY TWO!!!  Now, you little New Englanders might be wondering why I’m complaining.  After all, that’s what my sister in MA keeps her thermostat set at all winter.  But here in Phoenix that’s freakin’ cold…number one news story cold.

So needless to say I was looking for something that would warm my belly and bring me comfort.  What does that better than shepherd’s pie?  Searching on Pinterest proved difficult for this one.  Many of the links were bad (no link, spam, or didn’t go directly to the recipe), so I went to foodtv.com and found a pretty tasty looking recipe from Alton Brown.  Here’s the link: Good Eats Shepherd's Pie

Fair warning!  I changed this a lot; this is more of a loose interpretation of Alton's recipe.  So here’s my recipe too:


Mashed potatos – two cups of Main Street premade mashed potatoes from Costco

Filling:
                2 tablespoons canola oil
                1/2 cup chopped onion
                1 cloves garlic, minced
                1 pounds extra lean ground beef
                1 teaspoon kosher salt
                1/2 teaspoon freshly ground black pepper
                2 tablespoons all-purpose flour
                3 teaspoons tomato paste
                1 cup chicken broth
                2 teaspoon Worcestershire sauce
                1 teaspoons freshly chopped rosemary
                1/2 teaspoon ground thyme
                1/2 cup fresh or frozen corn kernels
1/2 cup fresh or frozen peas
½ cup of shredded cheddar cheese

Place the canola oil into a 12-inch saute pan and set over medium high heat. Once the oil shimmers, add the onion and saute just until it begins to take on color, approximately 3 to 4 minutes. Add the garlic and stir to combine. Add the beef, salt and pepper and cook until browned and cooked through, approximately 3 minutes. Drain the meat.  Sprinkle the meat with the flour and toss to coat, continuing to cook for another minute. Add the tomato paste, chicken broth, Worcestershire, rosemary, thyme, and stir to combine. Bring to a boil, reduce the heat to low, and simmer slowly 10 to 12 minutes or until the sauce is thickened slightly.  
While the filling is simmering prepare the potatoes according to the directions.
Add the corn and peas to the beef mixture and spread evenly into an 11 by 7-inch glass baking dish.  Sprinkle 1/4 cup of the cheese over the meat mixture, top with the mashed potatoes, starting around the edges to create a seal to prevent the mixture from bubbling up and smooth with a rubber spatula. Sprinkle the remaining cheese on top.  Place on the middle rack of the oven and bake for approximately 40 minutes. Let it set for 10 minutes before serving.

Mission accomplished; it was warm and satisfying!

Week Three Craft: Upcycled Shirt


There is something inherently exciting about repurposing (or upcycling) an item.  Like Dr. Frankenstein, you bring bits and pieces together to create new life.  Whether it’s converting an old door to a headboard, turning a spoon into a coat hanger or snipping grandma’s bathrobe into the latest fashion not only are you putting your own stamp on it, you are being a good citizen of the planet.  Waste not want not.

That being said…I’m not sure I’m ready for toilet paper roll art!

Here are a few of my favorites:


old bottles into a chandelier from dishfuntional designs


                    bottle tops into a strawberry basket from nicety


            an old trunk into a love seat from recreate 


One of my husband’s Hawaiian shirts was getting a little frayed around the collar, but I love this shirt and didn’t want to see it go.  Instead of putting it in the rag pile I turned it from Cinderella into :


a totally fun backpack!

I used McCall’s pattern 6663 with a few of my own embellishments.  The shirt pocket was repurposed into the backpack flap for some extra storage and I added a zippered pocket inside as well.  


There’s even enough left for another project.  Hhhmmmm….drink cozy anyone?


Saturday, January 12, 2013

Week Two Craft: Fabric Boxes


Sewmamasew.com is where the inspiration for this week's craft came from.


These quilted fabric boxes are just adorable and the tutorial is super easy to follow!  Find the full instructions here: fabric box tutorial.  I tweaked it just a little to make it my own; here is what I came up with: 


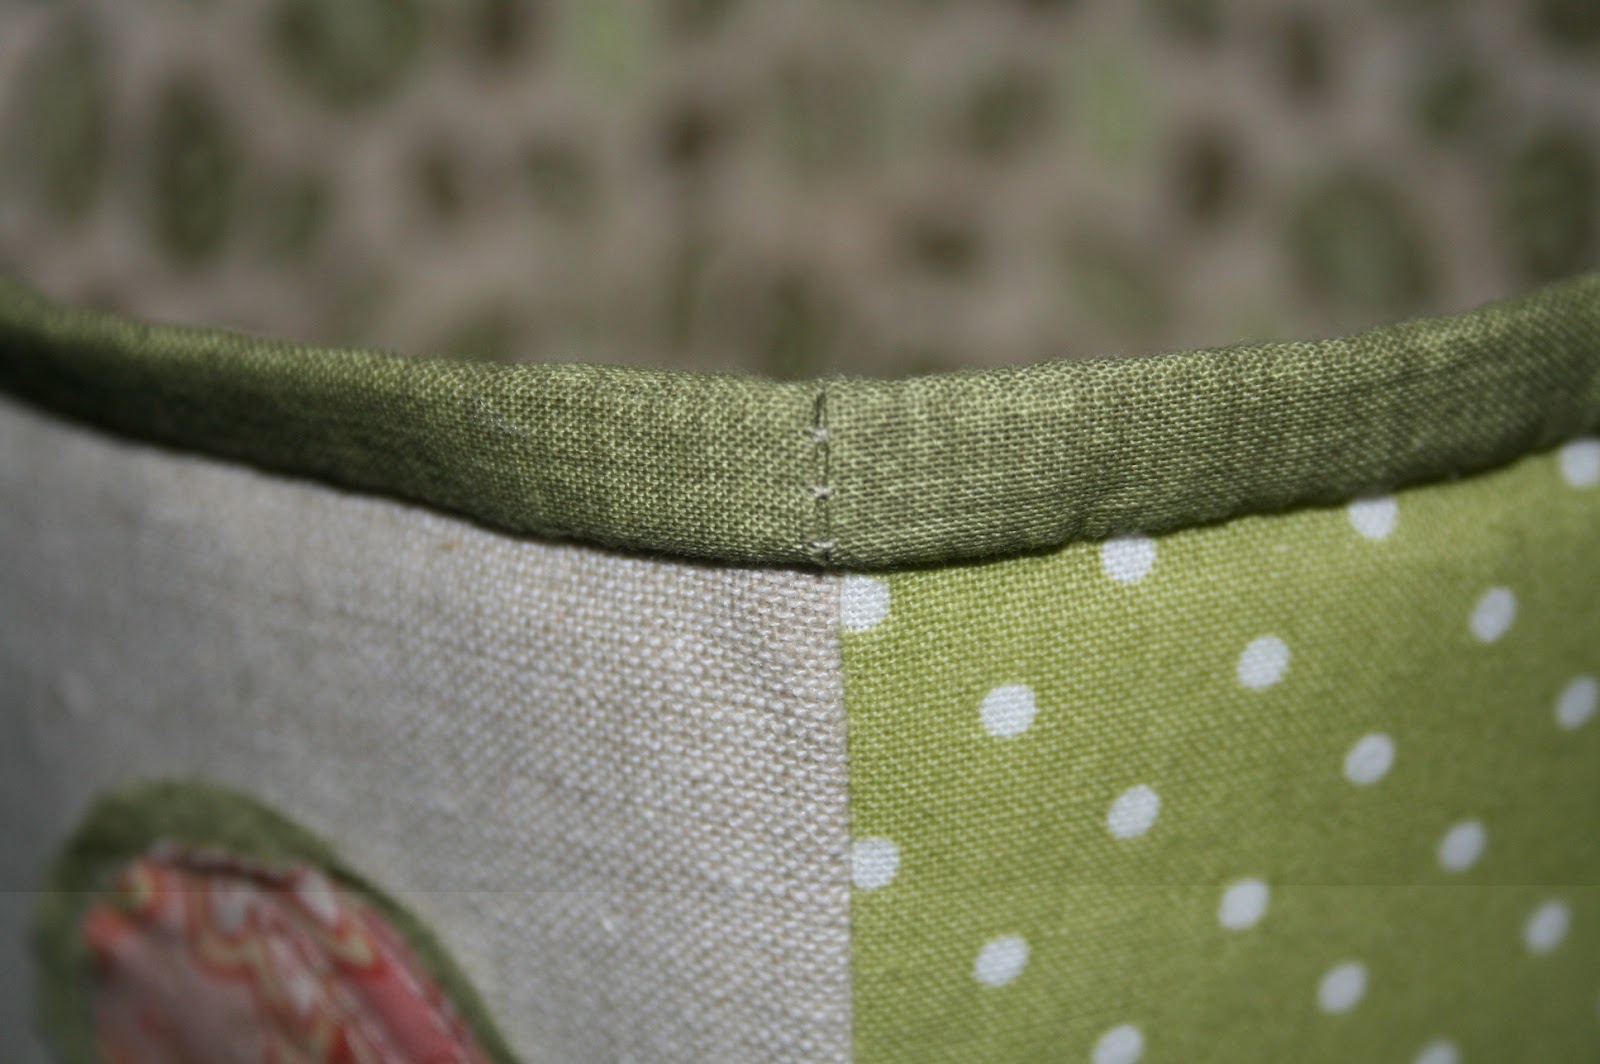
My fabric selection was based on what would help me clear out some of my stash.  The only thing I changed was how I finished the top.  Instead of folding and sewing the tops together I thought it might be more fun to add a binding, just like in a normal quilt.

Here's how I did it:
1. Cut a piece of binding that is 2 1/4" wide and 1" longer than the finished box circumference.  This was the 6" box which made the circumference 24".  The 1" is for a 1/2' seam allowance.  
2. Sew the ends together and fold the binding in half. 
3. Right sides together, stitch the binding to the box (I placed the seam on a corner so it would be less noticeable).


4. Bring the binding over to the inside and hand stitch in place.

Can't you just imagine making these in different holiday fabrics as a sweet little way to bring in a touch of the season?


Week Two Recipe: Healthy Chicken Breast

After last week's cookie splurge I thought I'd try a more healthy recipe for this week.  We all know that chicken is good for us, but it seems difficult to add flavor without adding fattening sauces, or breading, or frying, or cheese.  You know, all the things that make chicken worth eating!  I stumbled across this recipe for a stuffed chicken breast and despite the less than appealing photo thought I would give it a try.

This originally came from eatingwell.com.  Click here for the recipe.  I'm also posting the recipe here because on the website it lists additional versions of stuffing, but then lumps it into the same recipe.

  • boneless, skinless chicken breast halves, (1-1 1/4 pounds total)
  • egg white
  • 1/2 cup
    plain dry breadcrumbs
  • 2 teaspoons
    extra-virgin olive oil
  • 2 tablespoons
    reduced-fat cream cheese, Neufchatel
  • 1 tablespoon


    basil pesto, store-bought or homemade
  1. Preheat oven to 400°F. Coat a rimmed baking sheet with cooking spray.
  2. Combine cream cheese, pesto and pepper in a small bowl with a fork.
  3. Cut a horizontal slit along the thin, long edge of a chicken breast half, nearly through to the opposite side. Open up each breast and place one-fourth of the filling in the center. Close the breast over the filling, pressing the edges firmly together to seal. Repeat with the remaining chicken breasts and filling.
  4. Lightly beat egg white with a fork in a medium bowl. Place breadcrumbs in a shallow glass dish. Hold each chicken breast half together and dip in the egg white, then dredge in the breadcrumbs. (Discard leftovers.)
  5. Heat oil in a large nonstick skillet over medium-high heat. Add chicken breasts; cook until browned on one side, about 2 minutes. Place the chicken, browned-side up, on the prepared baking sheet. Bake until the chicken is no longer pink in the center or until an instant-read thermometer registers 170°F, about 20 minutes.
Surprisingly, this chicken is delicious!  That tablespoon of pesto added a lot of flavor.  Heres' what mine turned out like: 


A few of things to note:
1. I used panko instead of regular breadcrumbs
2. Notice I have no cream cheese/pesto oozing out of my chicken.  By following the recipe 2 tablespoons of cream cheese and 1 tablespoon of pesto does not make enough filling to ooze out of your chicken.  Either they meant "per breast" or they used the worlds smallest chicken breasts in their photo.  
3. Each breast weighed about 7 oz. and  needed about 10 minutes more cooking time.  

This recipe is definitely going in the regular meal rotation!

Thursday, January 3, 2013

Week One Craft: Mini Subway Art

I just love the "subway" art that I see on Pinterest and Etsy, so I thought I would start with that project.  


I thought this pin was a unique take on all the projects out there,
 so used it as my inspiration.


The V spot is where I found this tutorial.  You gotta love someone who puts in their description "this is where Erma Bombeck meets MacGyver"!


Here is my project:
Here's what I did differently from the original tutorial:
1. No Cricut machine (so sad!), so print letters, cut out letters, trace letters on contact paper and cut out letters.
2. I used a 5x5 artist canvas instead of wood
3. I didn't distress the canvas after painting

All in all, it still didn't take me too long.  I placed the letters on the white canvas and painted it grey.  The letters adhered to the canvas fairly well, but I still was very careful around the edges.  I then cut out a heart on contact paper, placed the outline (the relief?) on the canvas and used a stippling brush to paint the heart.  By using a stencil brush on the heart I had the total happy accident of the paint not leaking under the letters like it did with the grey.  It caused this highlight effect that makes the lettering stand out a little more on the heart.